

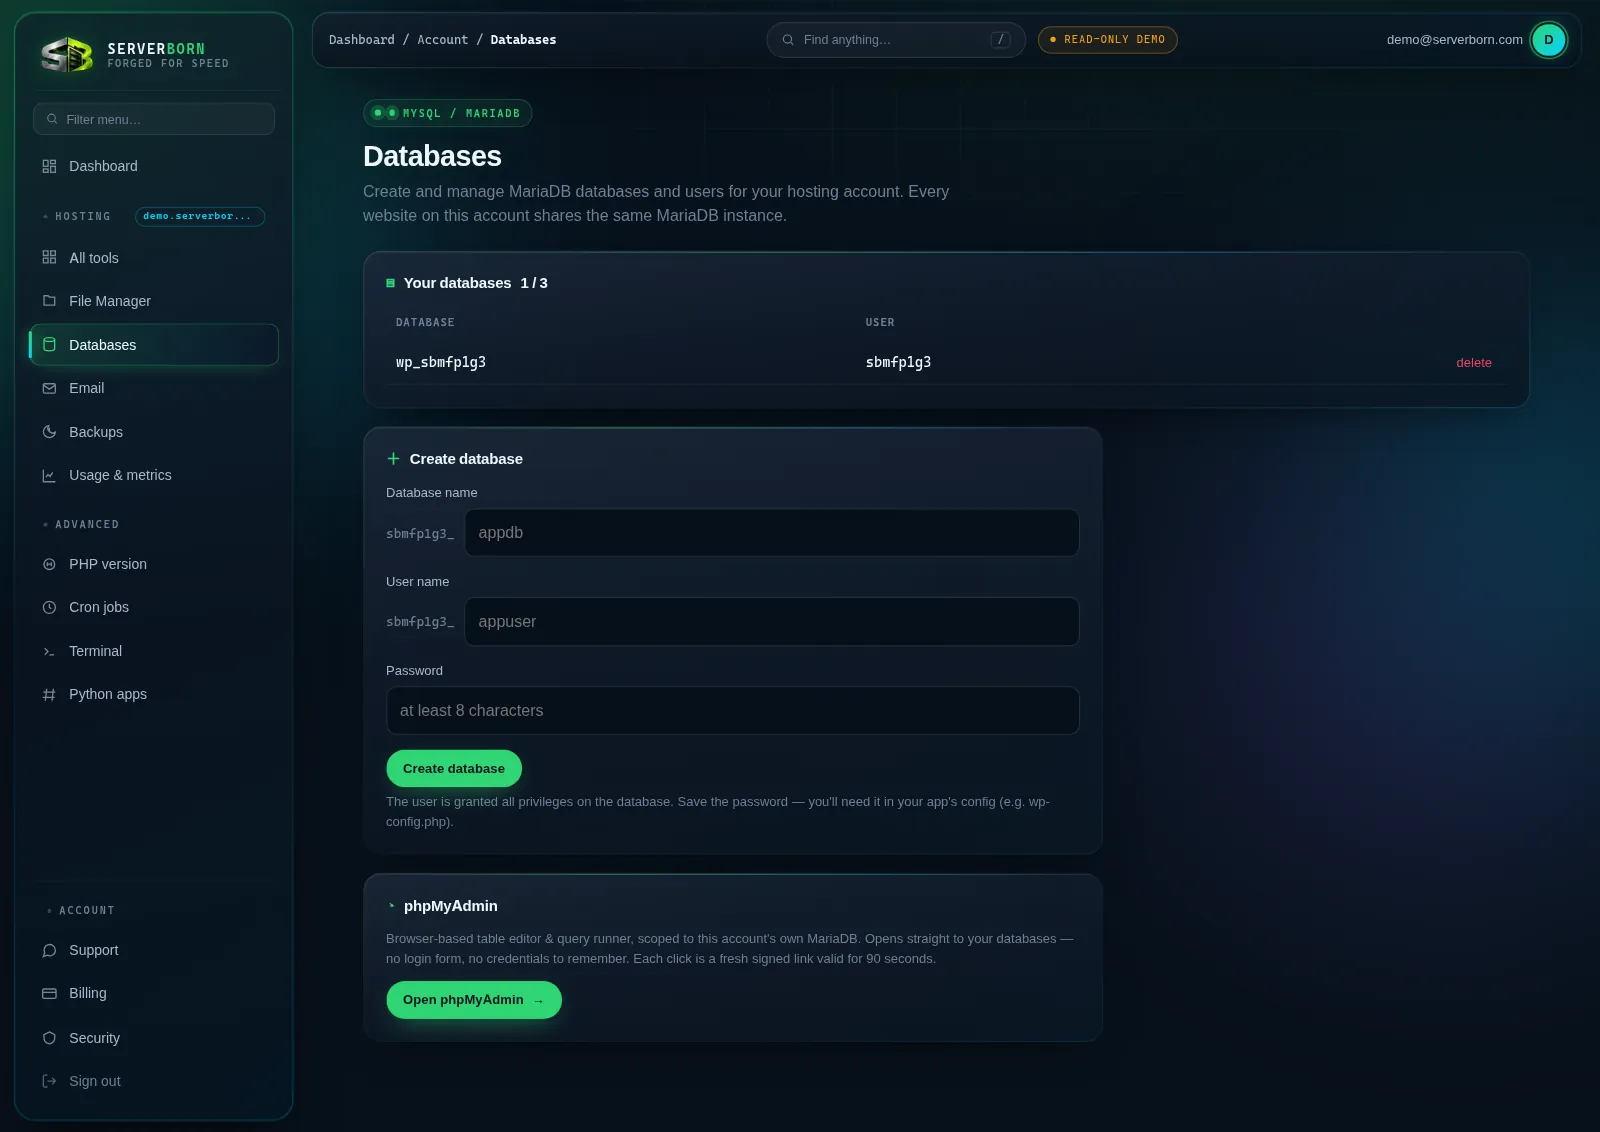
Create a database
- Open Databases
Sidebar → Databases under Hosting, or press
/and type “data”. - Name the database and its user
Both get your account prefix automatically (shown left of the box). Type just the short part, like
appdbandappuser. Letters, numbers and underscores only. - Set a password (8+ characters)
Copy it somewhere safe now: you'll paste it into your app's config (e.g.
wp-config.php) and the panel never shows it again. - Click Create database
The user is created with full privileges on that one database. Done.
One-click WordPress creates and wires its own database automatically. You only need this page for extra apps or custom code.
Open phpMyAdmin: zero login
- Click Open phpMyAdmin →
On the Databases page.
- That's it
A cryptographically signed link (valid 90 seconds, single account) drops you straight into your databases: browse tables, run SQL, import/export. No username, no password, no server address.
Search-and-replace a URL across a WordPress database, export a table before an experiment, fix a corrupted option row: phpMyAdmin is the right tool, and it's always one click away.
Delete a database
- Click delete on the database's row
In the “Your databases” table.
- Confirm
The database and its user are removed permanently. Any app still pointing at it will error immediately.
How many databases do I get?
It's per-plan: the counter at the top of the page shows used/allowed. Nightly backups include every database.
Can I connect from outside (remote MySQL)?
Not directly: the database network is isolated inside your pod for security. phpMyAdmin covers admin tasks; for app access, your code runs right next to the database with localhost speed.
What are the connection details for my app?
Host 127.0.0.1, port 3306, plus the database name, user and password you created here.